Sharon Rose Yacht Control
Been building this boat for about 30 years and we are just about to launch it for the first time.
When the Arduino came upon the scene I thought of a lot of cool things I could do with it on the boat. The systems to automate are as follows:
When the Arduino came upon the scene I thought of a lot of cool things I could do with it on the boat. The systems to automate are as follows:
- Fresh water pump
- Grey water pump
- Ammeter to measure battery charges
- Fuel Level in both tanks
- Engine
- RPM Gauge
- Water Temperature
- Oil Pressure
Fresh Water System
We have lived in many RV's and I found whenever you went to take a shower or run water the pump was always shut off.
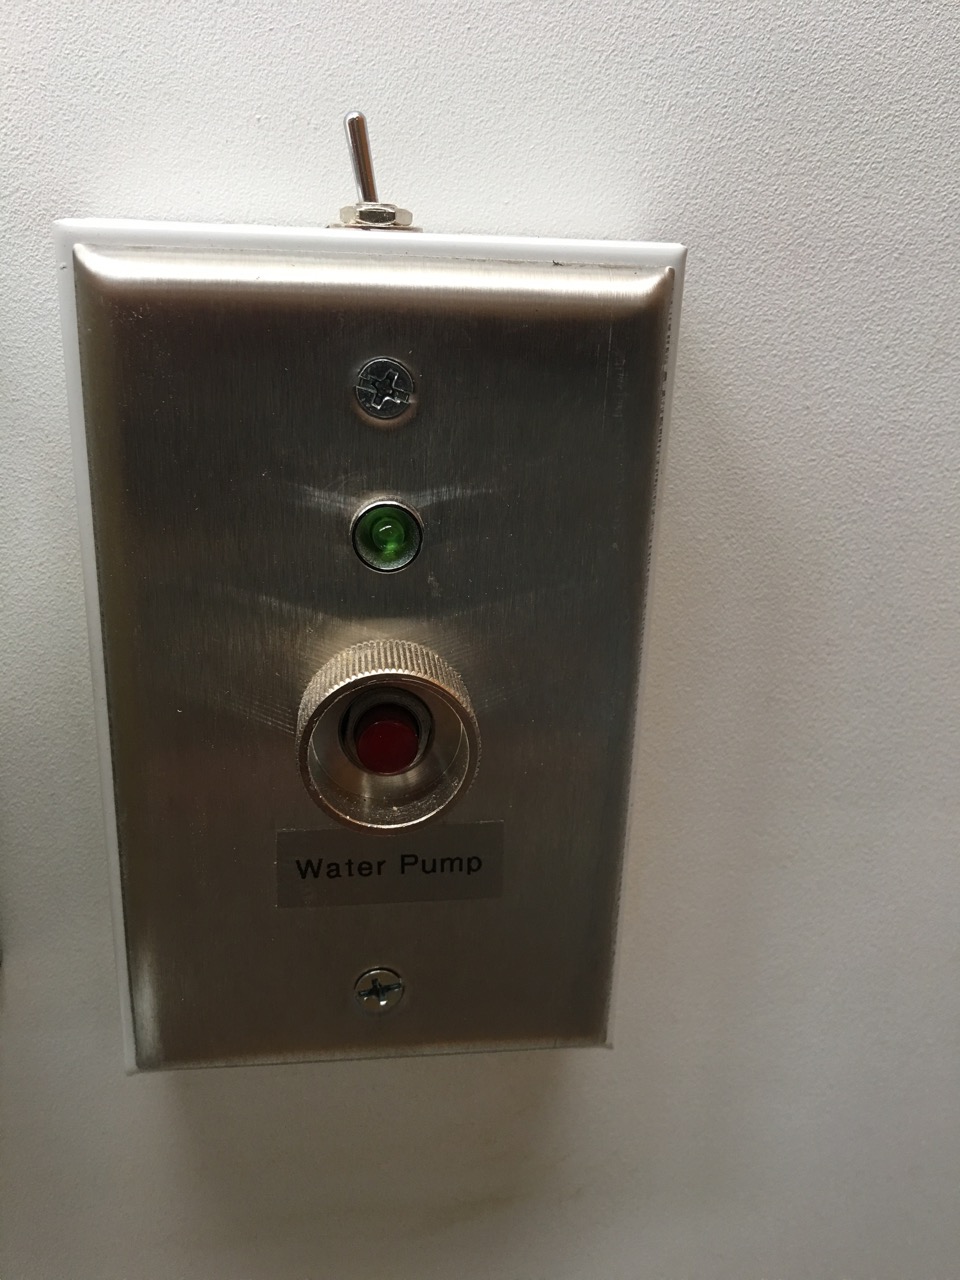
At each location, galley, head and Washer/Dryer I installed this control system. Momentarily press the button and the Arduino turns on the pump.
If there is a leak and the pump runs for 30 seconds the Arduino shuts the system down. System is on when green LED is lit.
At each location, galley, head and Washer/Dryer I installed this control system. Momentarily press the button and the Arduino turns on the pump.
If there is a leak and the pump runs for 30 seconds the Arduino shuts the system down. System is on when green LED is lit.
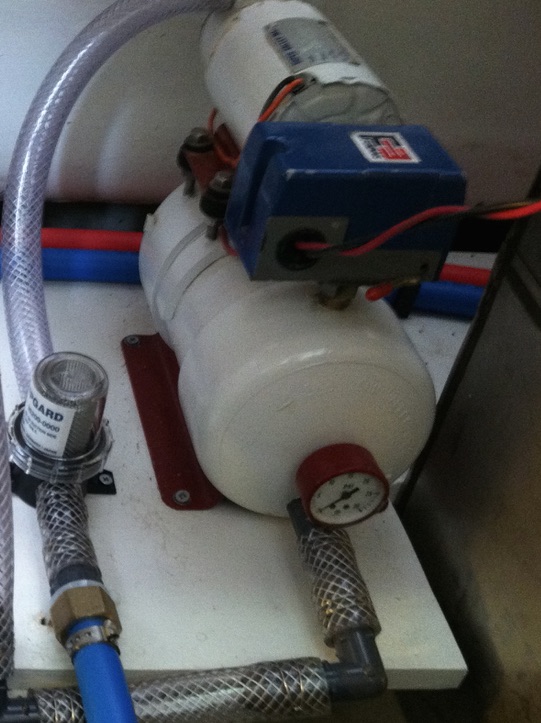
This was the old mechanical pressure switch. What a nightmare to adjust the turn on and turn off pressure settings.
Plus it wasn't able to go down low enough.
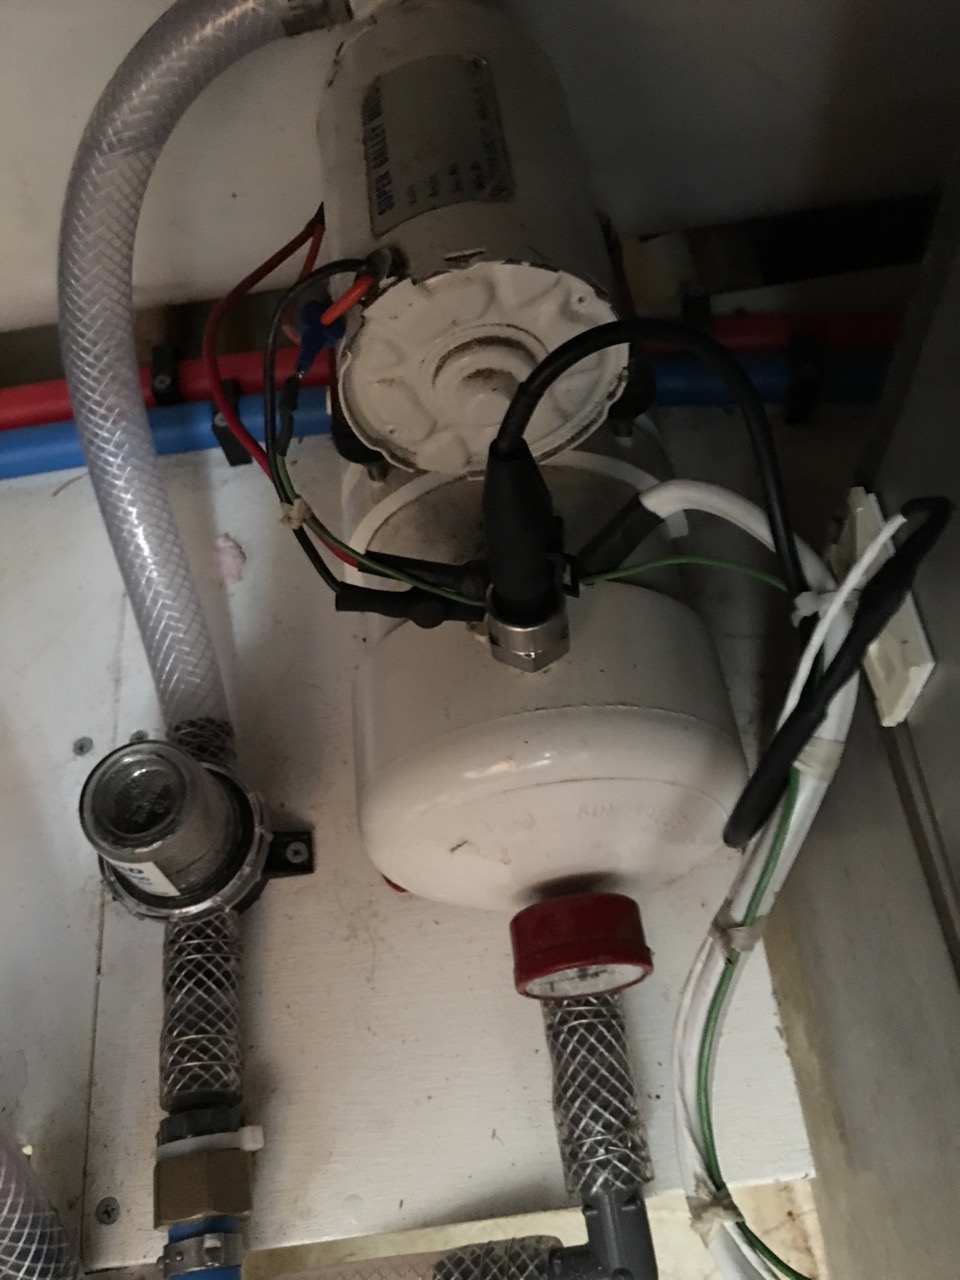
Here is the solution. A pressure sensor with an output the Arduino can read.
So all I need to do is program the Arduino to turn the pump on and off at different pressure readings.
So all I need to do is program the Arduino to turn the pump on and off at different pressure readings.
Engine

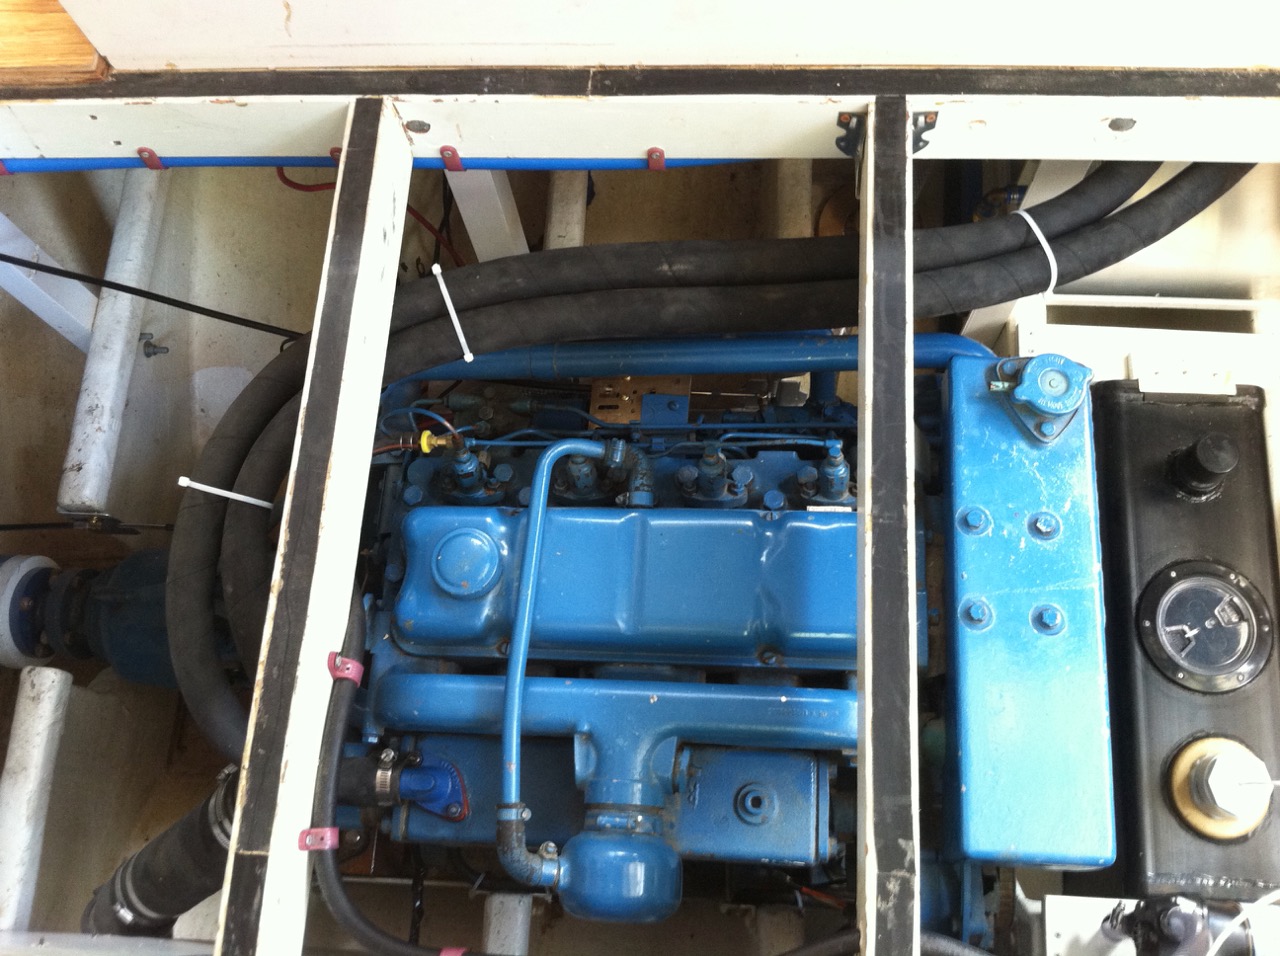
First consideration was how to measure the RPM. A diesel engine has no ignition system so they usually tap a signal off the alternator.
But when you need to change alternators you have a problem matching the new with the old. My solution was to mount a hall effect sensor that pulses for each revolution of the engine.
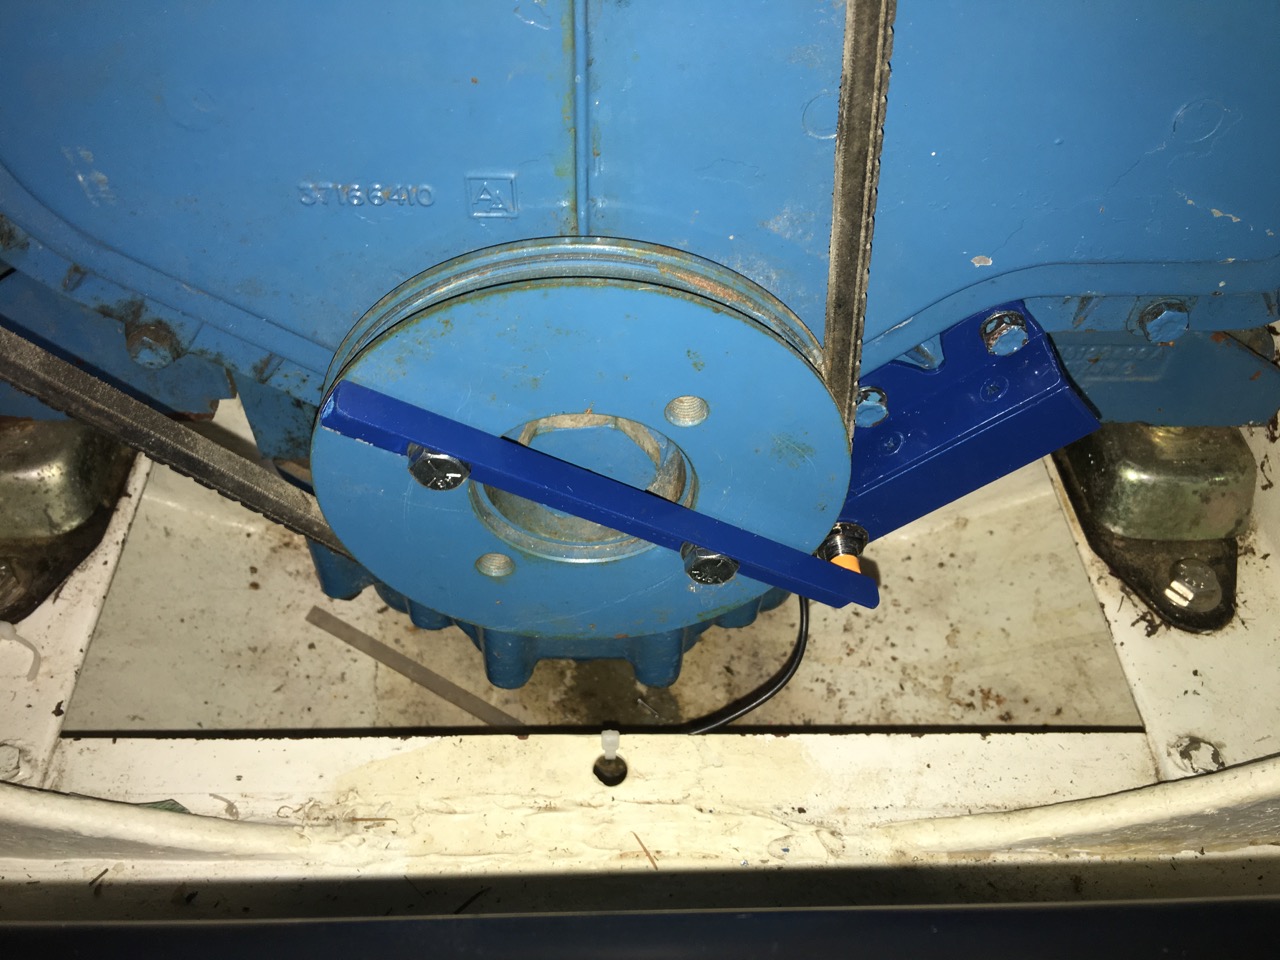
Then I mounted a strip of metal on the front of the engine that serves as a tab to pulse the sensor.
The Arduino forums and solutions show only one way to measure RPM but after testing it I found out it did not work properly. It was way too flaky at lower RPMs, so I had to create my own routine to measure the RPM accurately.
The Arduino forums and solutions show only one way to measure RPM but after testing it I found out it did not work properly. It was way too flaky at lower RPMs, so I had to create my own routine to measure the RPM accurately.
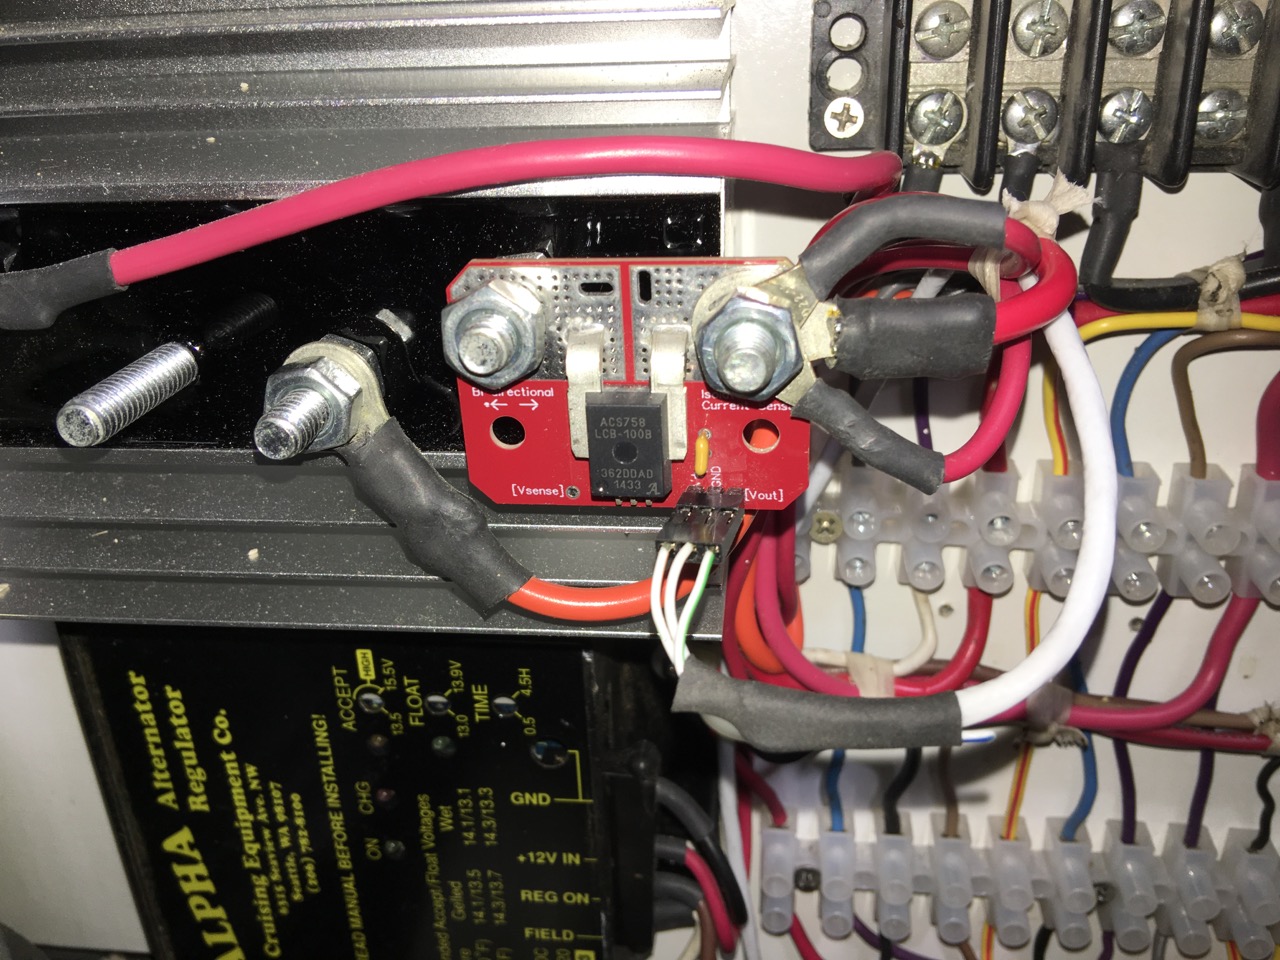
To measure alternator charge I used a CS-100A sensor that puts out 5.0 volts at 100 Amp.
For the oil pressure and coolant temperature sensors I used the ones that were mounted on the engine.
I used an OP amp to bring the voltage to 5.0 for max temp and oil pressure. By using the Arduino, when it comes to sensor replacement, I can use any oil and temp sensors that will fit on the engine.
Grey Water

Here is the grey water tank, sensor and pump. As far as sensors go I tried the Arduino ultrasonic unit, then just metal probes and finally used aquarium float switches.
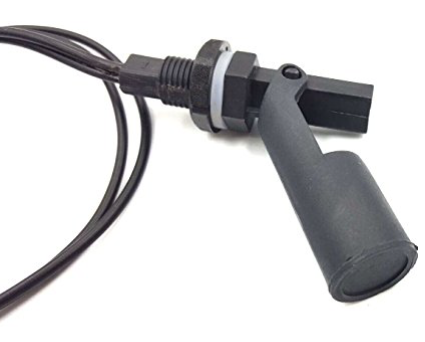
Here is the float switch I finally used, both mounted inside the waterproof tube. One closes when the water gets too high, the other when it is empty.
The beauty of the Arduino is that you can program in a timer that turns the pump off if it runs too long.
Putting it all together

This the the Arduino Mega and relay card mounted in a water proof enclosure.
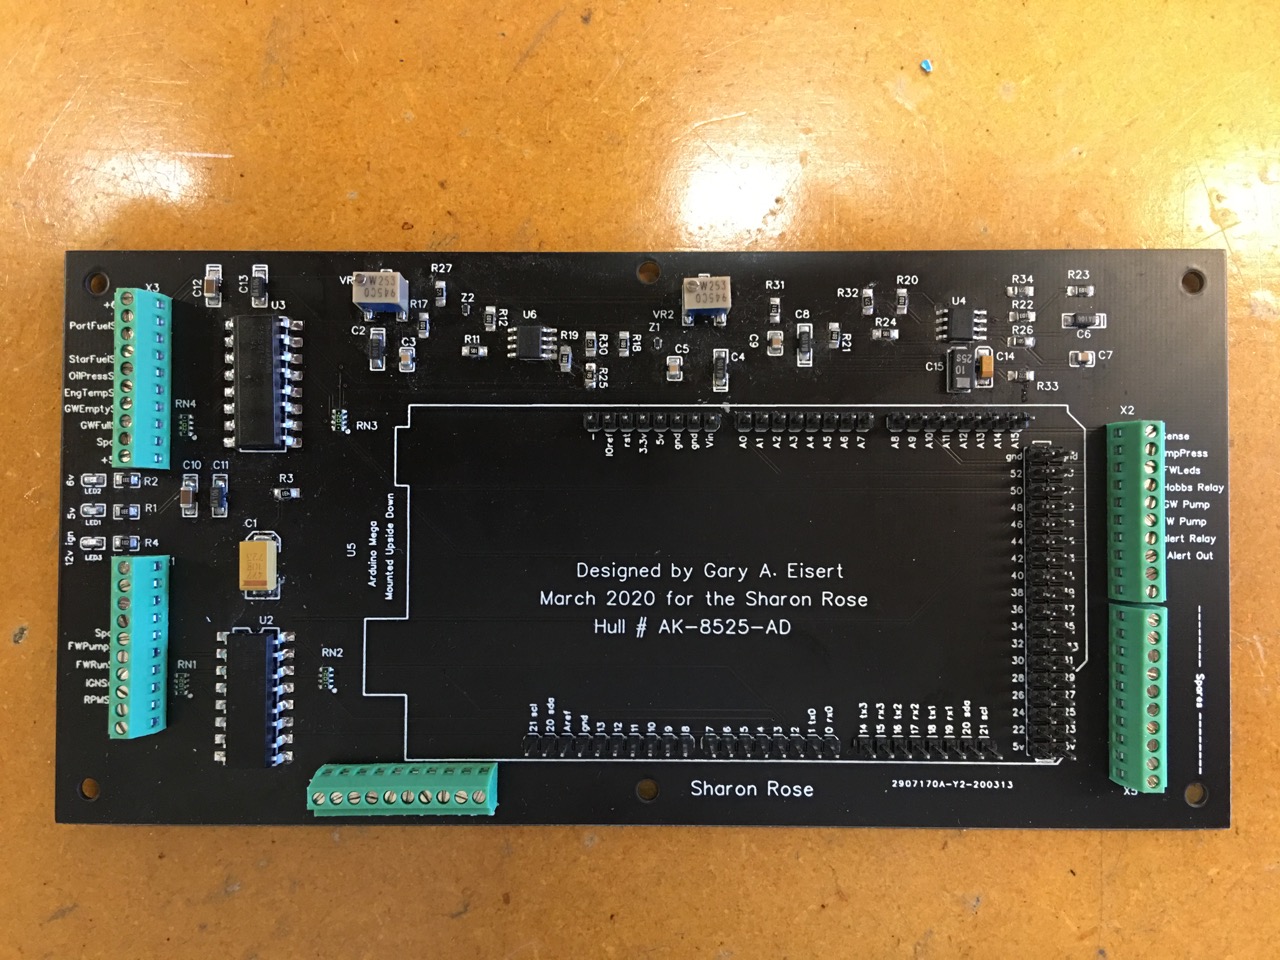
This is the circuit board I designed that pads all the inputs to the Arduino. I never hook up sensors directly to the Arduino.
I use opto-isolators for digital and OP amps for the analog.
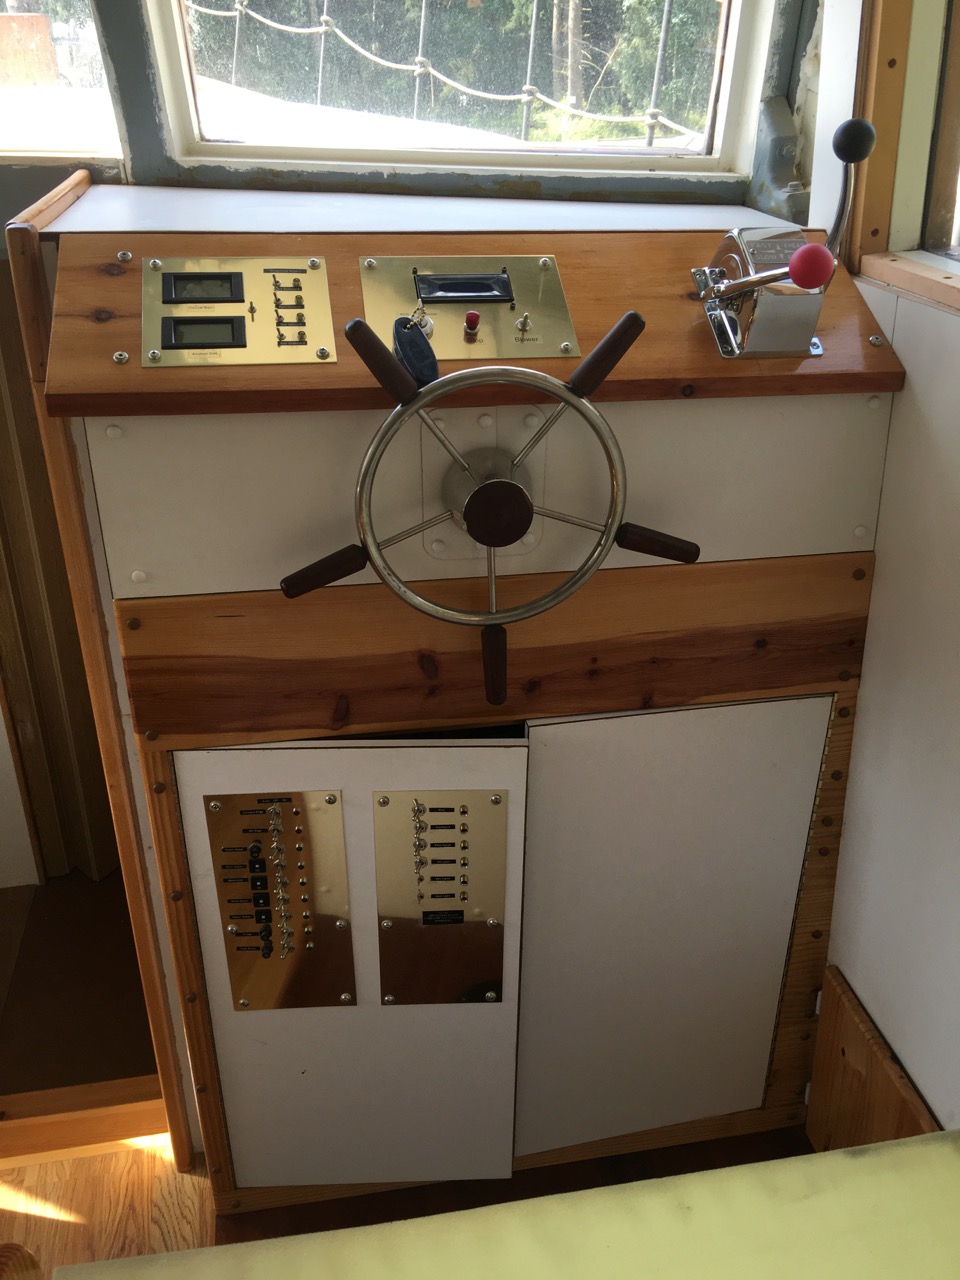
Here is a picture of the helm, with electrical/electronics mounted below.
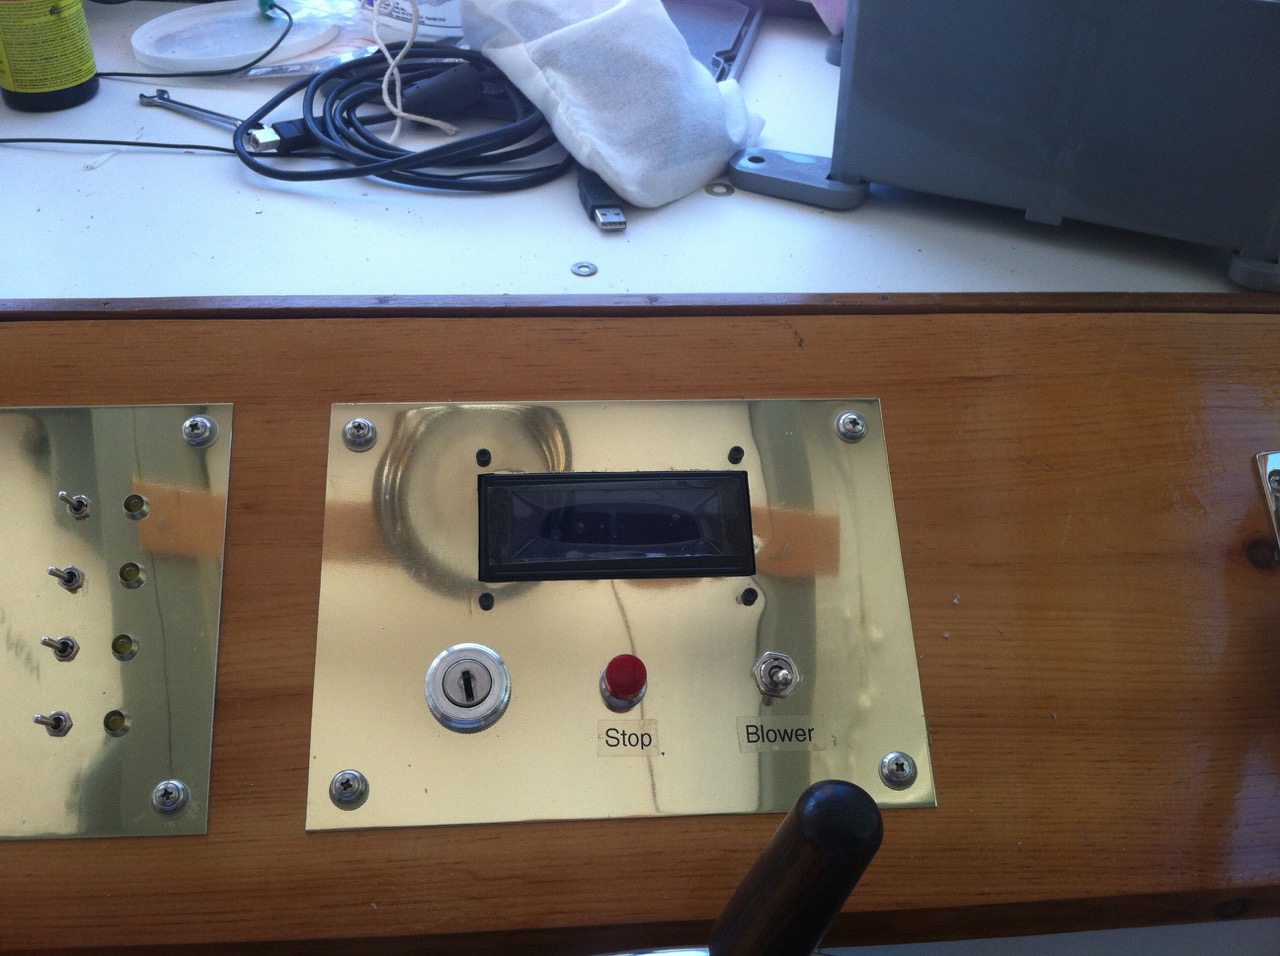
This is the complete engine control panel. How cool it that !

Close up of sample readout.
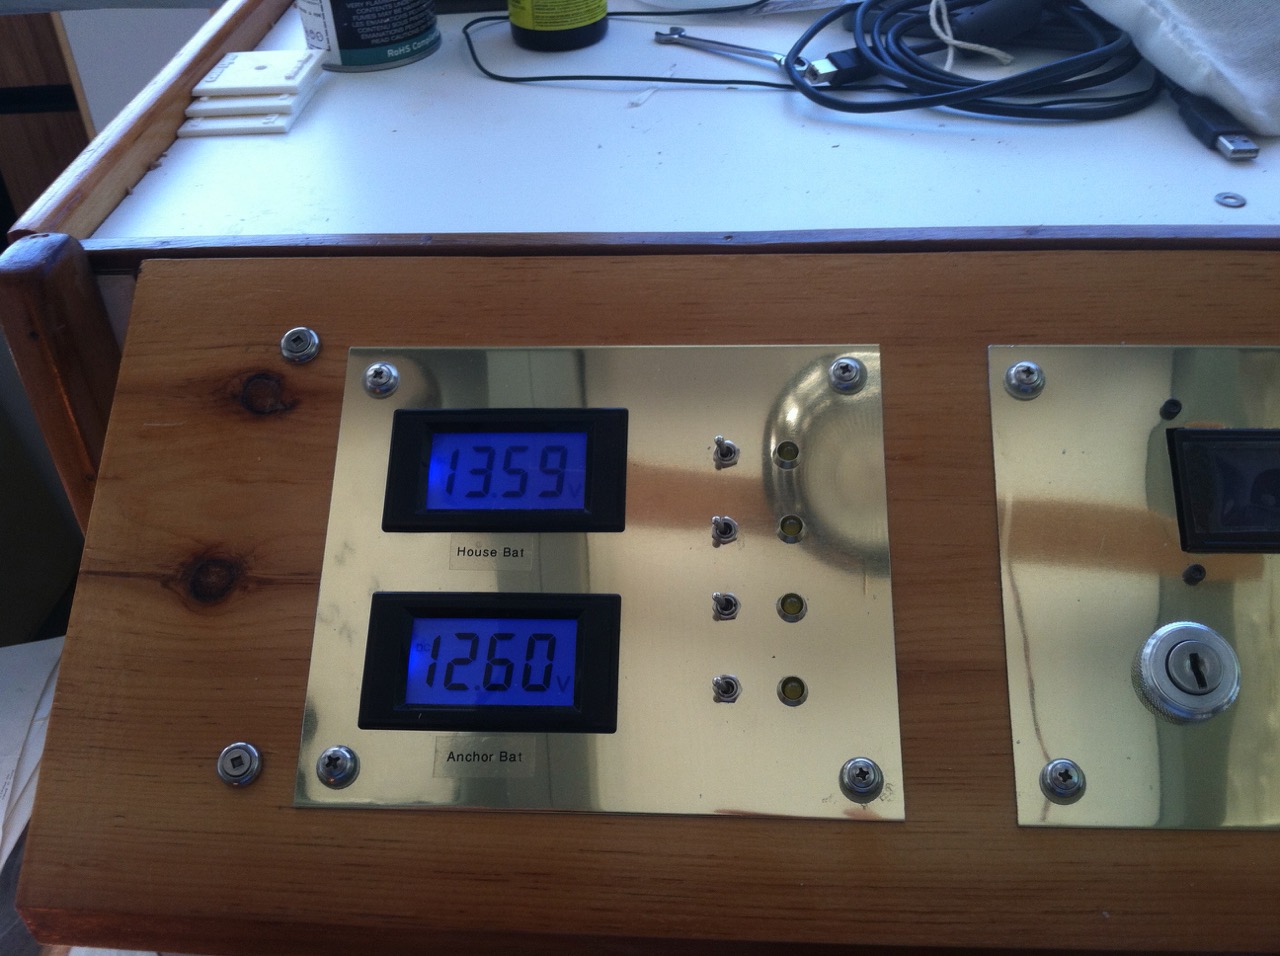
This shows the battery voltages (state of charge) and the windshield wiper controls.

Switch panel mounted on the front of the control cabinet.
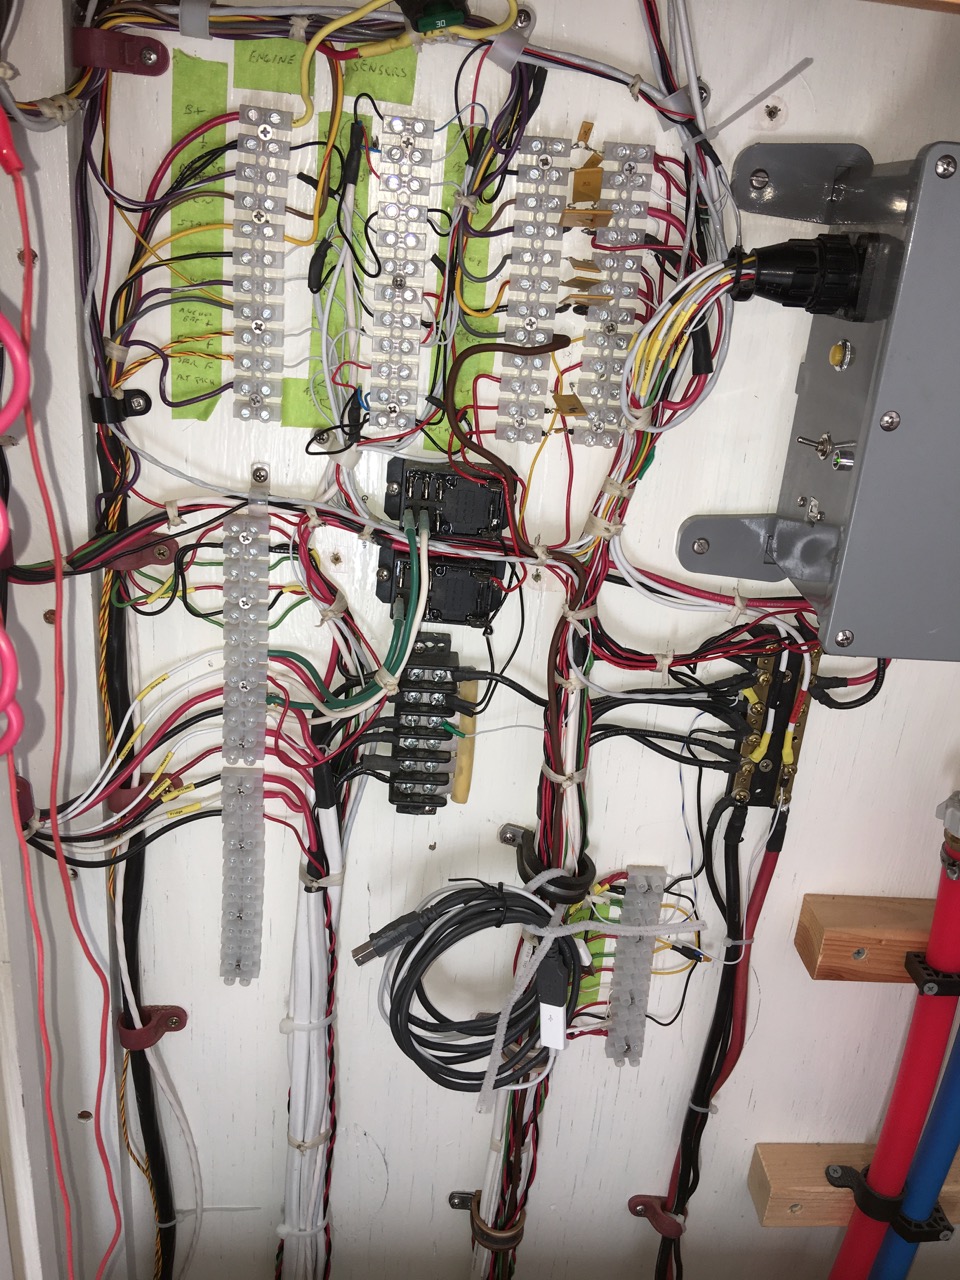
Control panel wiring layout. Arduino Mega safely installed in waterproof case.